Part IV. The final stages of work on the hull, including interior details and fitting the engine.
Tiger 131 was captured in April 1943. In September 1951 it was passed to the Tank Museum where it soon became one of the most famous vehicles in the collection. In 1990 it was decided to restore the tank to running order. Battle damage would not be repaired.
In November 1999 the Tank Museum created a website to track the restoration project. This site featured monthly updates for 4 years. This series of posts will republish some of the photographs and details featured on that site, and then bring the story of Tiger 131’s restoration up to date.
Hull details
With work on the turret effectively complete, we now returned our attention to the hull. By previous standards what remained to be done was detail work, but there was plenty of it none the less.
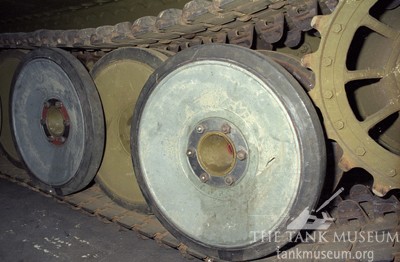
First of all it was necessary to refit the external road wheels that had been removed for repair, remembering first to repaint the inner ones of course.
Then there were fittings such as the main engine cover hatch. This would be one of the last items to be fitted to the tank but now was the time to get it ready.

And there were the interior fittings to complete too.
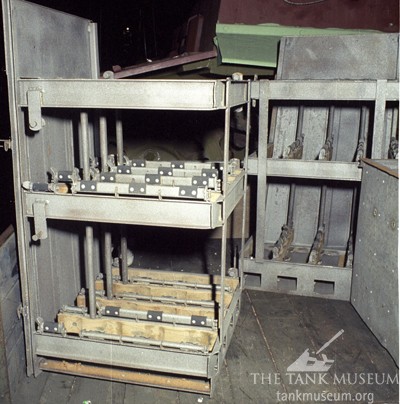
This is one of the internal ammunition stowage racks, cleaned back to bare metal and with all the packing materials restored or replaced.
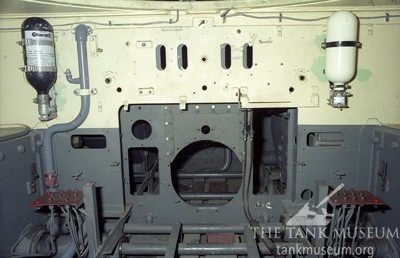
In the interests of safety it was necessary to make one compromise with authenticity. The Tiger needed a modern fire-suppressant system.
The team from fire protection company Kidde Graviner, in conjunction with the staff at ABRO, came up with a system. Here we see the two containers located on the firewall between the crew compartment and engine. A control panel was installed above the driver’s head.
Just look at this!
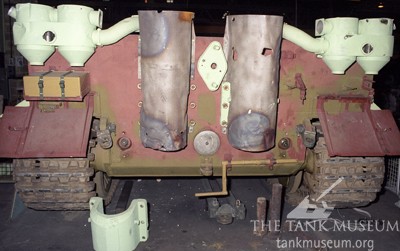
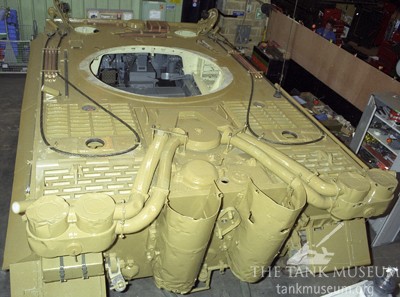
Work is nearly complete on the rear of the hull.
The Fiefel air cleaning system is in place, the battered heat shields from the exhaust stacks are repaired (except for obvious battle damage) and one of the big castings that holds the exhaust tube in place is waiting to go on.
The hull near completion
In a post from October 2001 we see that, at long last, the comprehensive rebuild is close to completion.
This is the time for details and here we see the hull, virtually complete, and the Fiefel air filtration equipment installed.
Most of what you see is original. Only such details as the tow ropes and gun cleaning rods are modern recreations.
This is an interior view of the hull machine-gunner’s side with his hatch open. Just look at the attention to detail and the excellent condition of the weapon mounting. Lots of detail items are still required for completeness, machine-gun ammunition pouches for example, but these can be collected and installed once the tank itself is finished.

On the driver’s side the same applies.
The 88mm rounds in the stowage lockers are fabricated but everything else is original, with the exception of the little box, high up in the corner. This is part of the modern fire-fighting system which has to be sited where the driver can see it.

Installing the engine
The last step in this long and fascinating process is the installation of the impressive Maybach HL230P30 V-12 petrol engine.
Here Ron is putting the final touches to the big power unit.
Those who have followed the story right through will recall that this engine came from the Tank Museum’s Tiger II and in reality would be more applicable to late production Tiger I tanks.
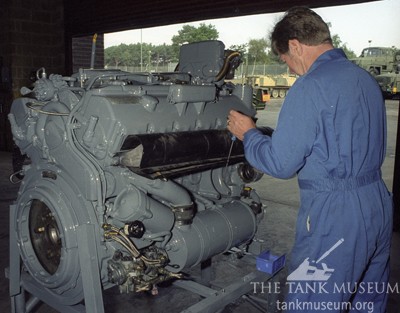
Ron and Dave are deaf to the world as they test-run the engine on a temporary rig in the cover photograph. The HL230P30 is a 23 litre engine which, in service, developed 700 horse power at 3,000 rpm. It equipped Panther, Tiger II and late production Tiger I tanks.
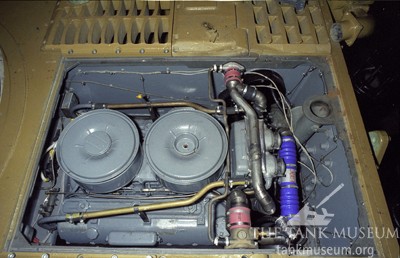
Finally the engine is installed!
The most obvious difference from the original HL210 engine is the use of two large air-cleaners instead of three smaller ones but of particular interest here is the black fitting on the far side.
This is one of the newly-made fan drive gearboxes which had to be specially manufactured for this tank due to the engine change.
In the next post, we’ll see how she runs!
See Part III: The Turret and Part V: A Setback and a Repaint.